Streaming HOWTO for Artists
Instructions for testing your streaming setup with Online Concert Thing
1. First you need Open Broadcast Studio. It’s free software and works well.
Remember though that the OCT Test Server is only running during your scheduled sound check time, so the auto-configuration wizard won’t work until the server is running!
https://obsproject.com/
– download for your system (PC, MAC or Linux)
– double-click the .DMG file you downloaded. The install wizard will help you install the program.
2. Do not run the Configuration / Quickstart Wizard at this time, though, because the test server is not running until we start it for your sound check!
https://obsproject.com/wiki/
– find and open the QuickStart Guide if needed
3. Here’s a helpful video James recorded, walking you through configuring your settings. You can watch it in a separate window and follow along with this page 🙂
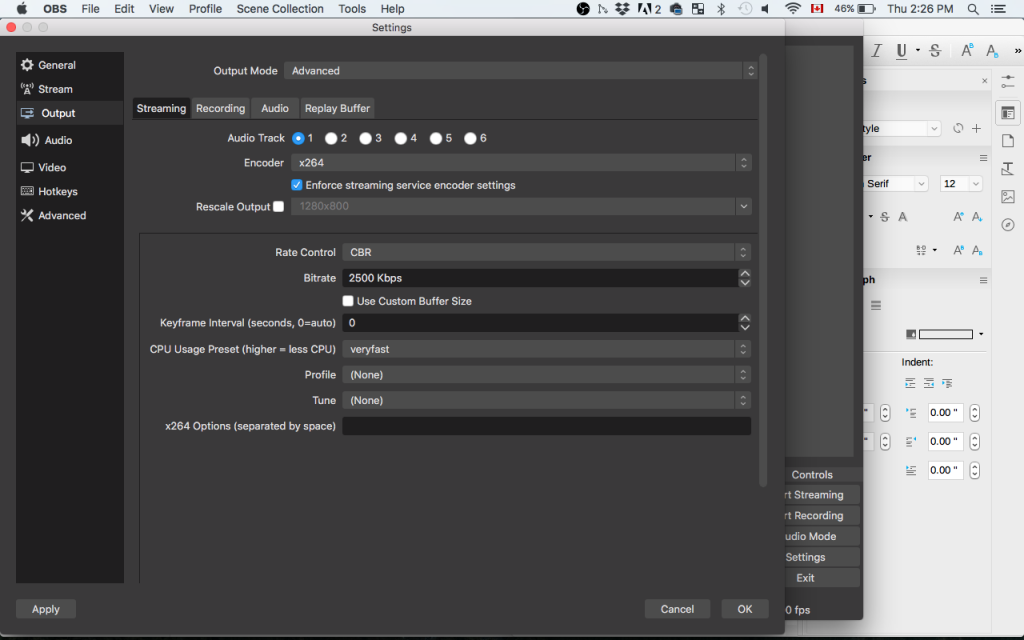
4. Double check your SETTINGS:
(main page: grey button on bottom right)
– set Bitrate to 1000 Kbps (or if your connection is particularly slow, try lower values – we’ve had success with rates as low as 750 Kbps on more rural connections)
– set Rate Control to “VBR”
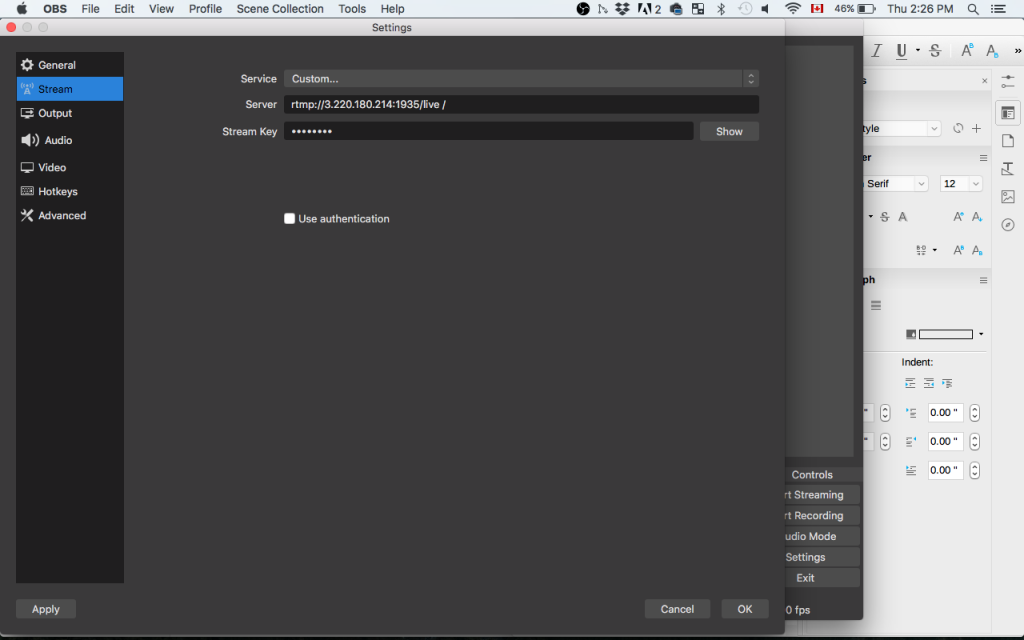
At LEFT: Stream tab:
Service = Custom
Server:
Stream Key: You will be emailed a server & stream key to enter here – just cut and paste them from the email! Please note, you will get a different server & stream key on the day of your concert.
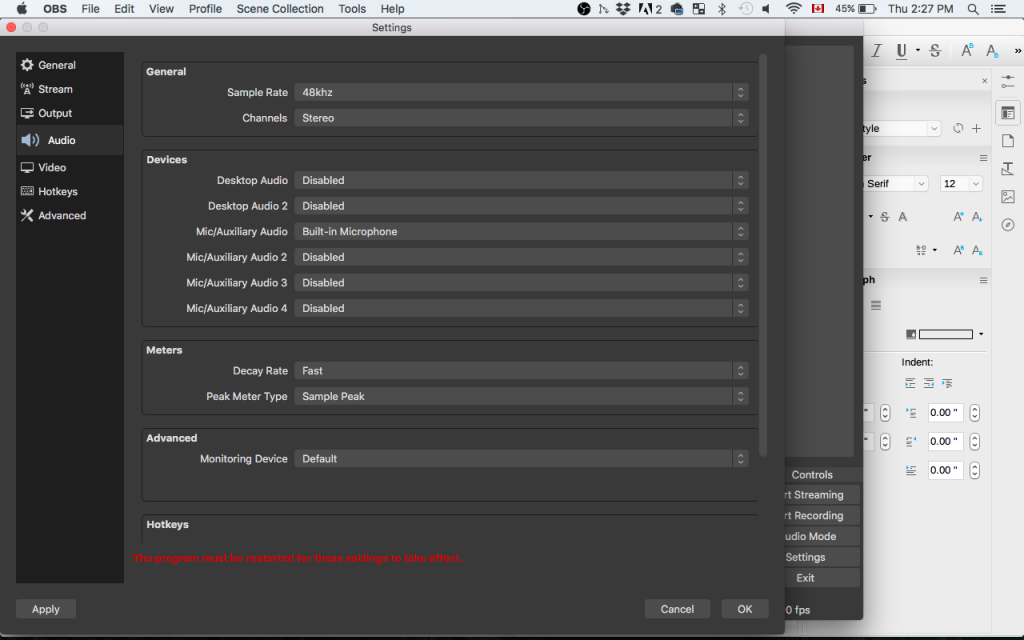
5. At LEFT: Audio tab:
Sample Rate = 48khz
Channels = Mono (unless you have a stereo source)
Desktop Audio = Default (or Disabled)
Mic/Auxiliary Audio = Built-in Microphone
6. At LEFT: Video tab:
Output (Scaled) Resolution: 1280×720 or 640×360
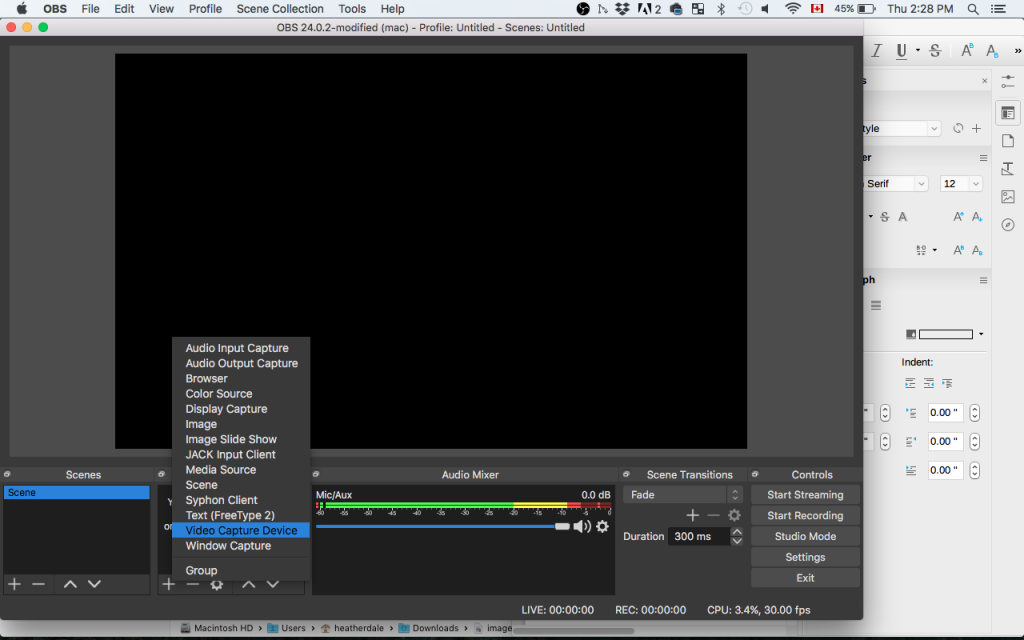
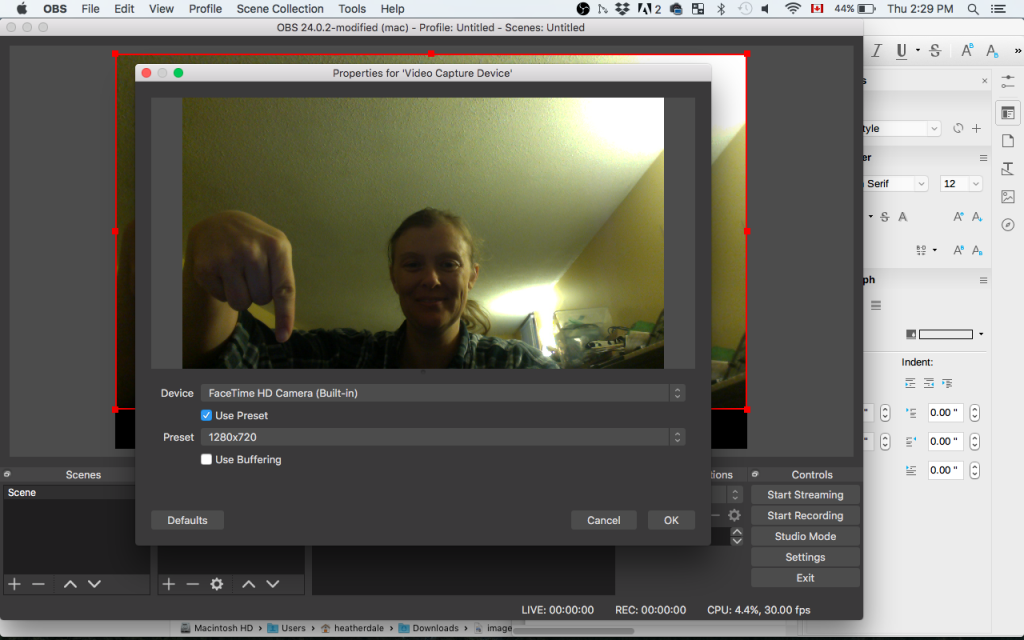
7. Define your Sources
(main page lower left) = Video Capture Device = FaceTime HD Camera (Built-in), Preset 1280×720
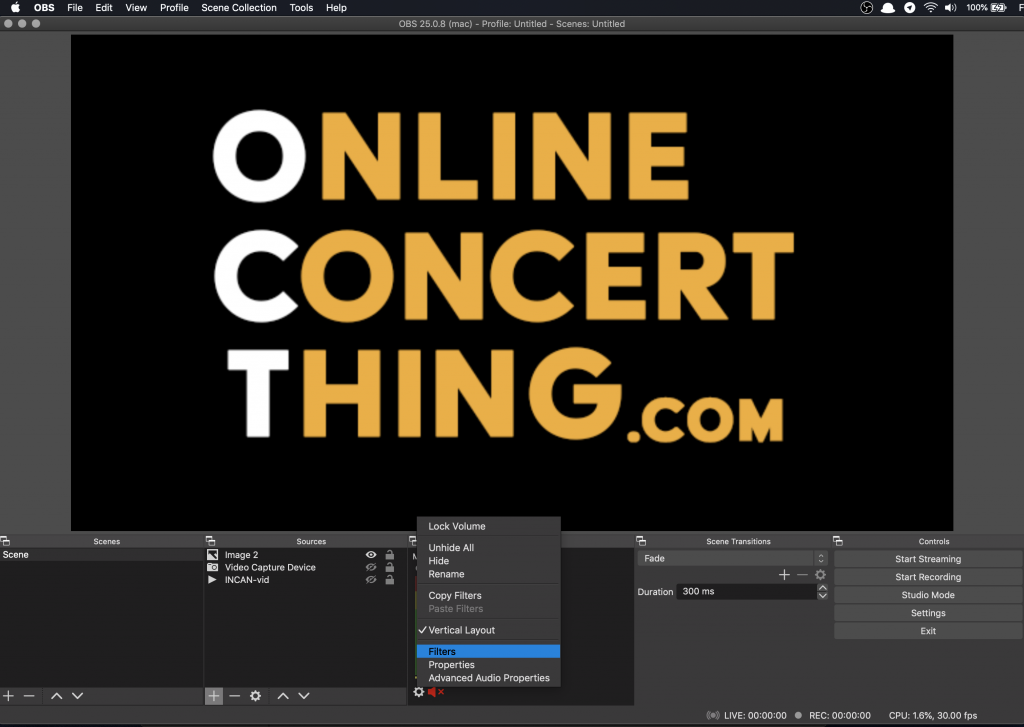
8. AUDIO MIXER PLUGINS:
Click on the gear icon under the input on your Audio Mixer (central box in bottom row) and select Filters.
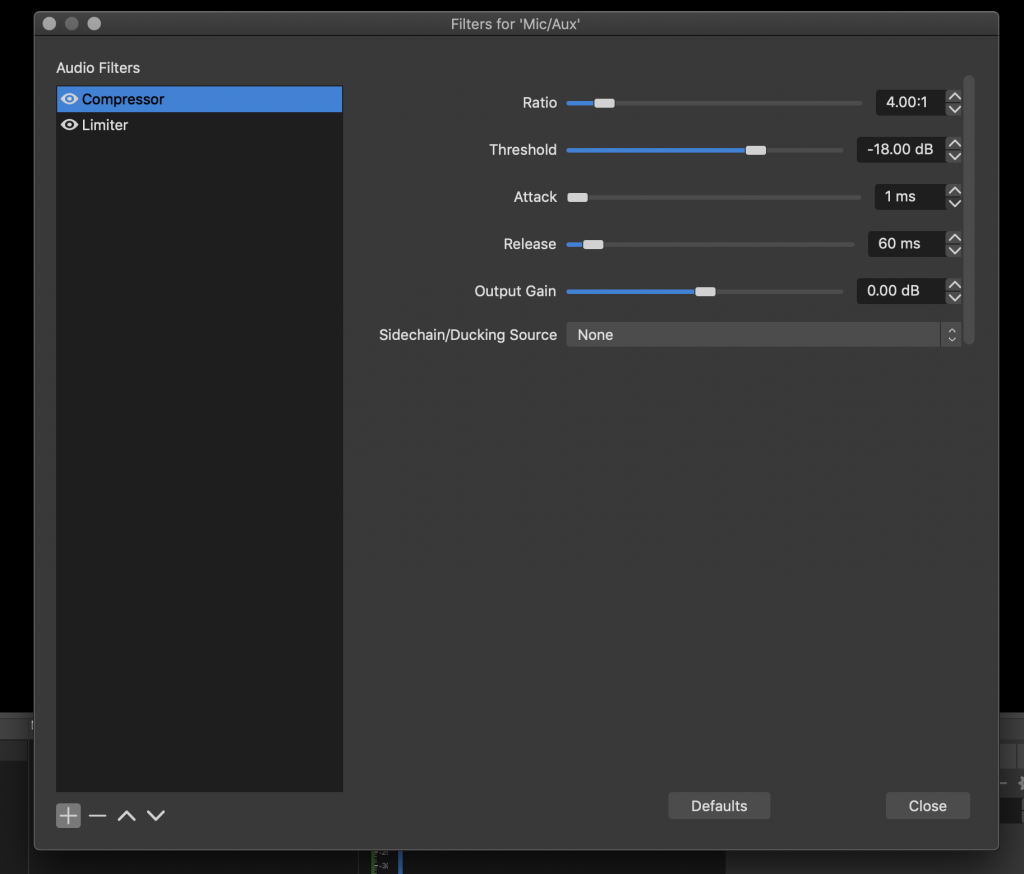
Click the + icon at the bottom left of the popup and select Compressor. Give it a name (I suggest “Compressor”!) and configure its settings. I suggest Ratio 4.00:1, Threshold -18.00 dB, Attack 1ms, Release 60ms, Output Gain 0.00 dB, Sidechain/Ducking Source None. (If you’re experienced with compressor settings and want to play with these, by all means do so. These are just suggestions based on normal use cases for OCT.)
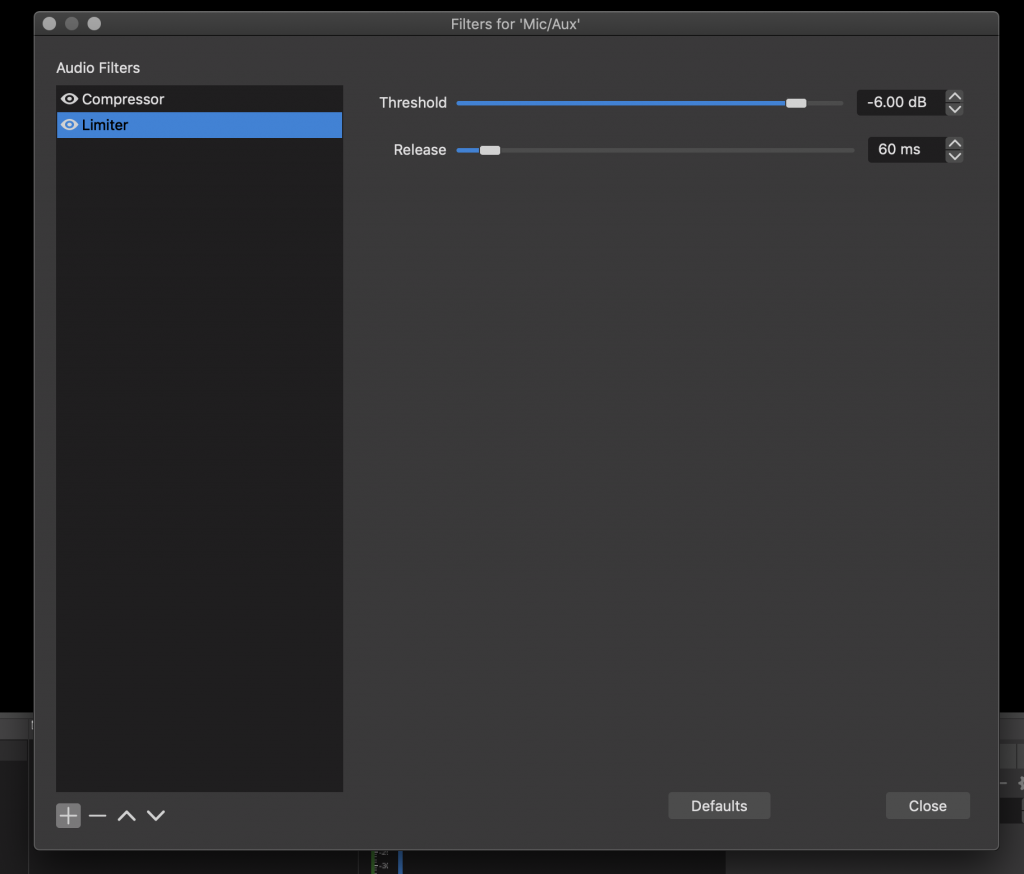
Click the + icon and add a Limiter, just like you added a Compressor. I suggest a Threshold of -6.00 dB and a Release of 60ms, but again, if you know what you’re doing, by all means change that to something you’d prefer!
That’s it for your setup!
PLEASE NOTE: you MUST have all these steps completed before your scheduled tech check call. If you aren’t ready, please reschedule with us; we usually have tight timing to get everything done. Thanks.
TECH CHECK CALL:
We will schedule a short live phone call with you, to ensure your setup is working well. When your OnlineConcertThing onboarding person (probably me, Ben) gives you the go-ahead over the phone,
you go to the bottom right hand corner and press “Start Streaming”. Then we discuss the quality of the stream and any modifications to settings we might want to make 🙂 These calls should take 15 to 30 minutes except in exceptional circumstances.
DOING YOUR OWN SOUND CHECKS:
Once you’re all set up, you can sound check to your heart’s content… here’s where you put on a pair of headphones, tweak your mic placement, and get your camera angles just right. Simply hit the “Start Recording” button in OBS. Once you’ve got everything sounding & looking perfect, hit that button again to stop.
In the File menu at the top of your screen, click “Show Recordings”. That will bring up the location of your new recording so you can open and watch the file. If you need to change formats, you can “Remux Recordings” to make it a .mov or .mp4 file.
PLEASE NOTE: Your tech check call is NOT the time to be doing a “how do I sound/look” check. That will remain your responsibility, on your own time. The 30-minute live tech call is only to ensure that your internet streaming is working well. Of course we can give you audio tips, but we must keep those calls as efficient as we can — you can imagine our schedule when we have 30 festival artists to check! 🙂
ON THE SHOW DAY:
OCT will ensure that you have the correct Stream URL & Stream Key, to connect you to our servers at showtime.
Have your phone handy no less than 5 minutes before your start time — you will get a text from OCT saying “Go Go Go”. When your OnlineConcertThing onboarding person (probably me, Ben) gives you the go-ahead,
you go to the bottom right hand corner and press “Start Streaming”. Start performing as soon as you see the little green square in the bottom right corner of the OBS screen 🙂
SOME THINGS TO LOOK OUT FOR:
- Most important: If you’re signed in to the concert (say, to have someone hang out in the chat on your behalf) don’t forget to MUTE THE AUDIO ON THAT COMPUTER. Otherwise there’s a really slow, really weird form of feedback like people singing into infinite delay machines, which is really not that great for anybody 🙂
- Sound is always more important than visual in online concerts, so make sure to check that your microphone is not clipping (going into the red on the indicators below the video panel). Try using “Start Recording” to record a bit of you playing live, and then listen to the recording (File -> Show Recordings) to check it out. The system is very forgiving but if you wanted to sound like Alison Krauss and instead sound like a Dalek singing for Motorhead, that might not be to your fans’ taste. (Or you might discover a whole new artistic identity, who am I to judge!)
- If you have all the settings entered correctly but can’t seem to connect to OnlineConcertThing’s servers, check that your firewall isn’t blocking port 1935 (the default TCP port for RTMP streaming).
- Check to see if your DHCP setup is configured to “Default” – this can take care of some unusual errors with refused connections: Settings->Advanced->Networking (the bottom section) bind address to Default
- Sometimes having IPV6 enabled seems to cause issues on Windows machines: Control Panel->Networking and sharing center->change adaptor settings (find the adaptor)->Properties & uncheck IPV6 protocol
- If you are experiencing dropouts because of a slow internet connection, try the suggestion above about lowering the Bitrate in the Output tab.
And of course, if it all goes horribly wrong, consult with Ben at ben@onlineconcertthing.com 🙂